Interior Painting To Help Sell Your Home

How to Paint a Room

Painting a room can be a task that takes a couple of hours, a half day, or more. It all depends on what and how much you decide to paint. You can freshen up a room by giving a door or cabinet a new coat of paint in just a few hours. Or you can break it into smaller jobs and spread them out over a week or more. Whatever the size of the job you decide to tackle, the painting techniques remain the same.

In this article, we’ll take you all the way through the process of painting a room. From prepping to cleaning up, we have the job — and your room — covered. We’ll start at square one, with how you should use your painting equipment.

Brushes

When you embark on an interior painting job, you’ll soon discover how easy it is to use brushes and rollers competently. Even so, there are a few techniques that will help postpone fatigue and provide a neater job.

The grip you use depends on the brush you’ve chosen. Trim and sash brushes with pencil handles are grasped much as you would a pencil, with the thumb and the first two fingers of the hand. This technique gives you excellent control for intricate painting. With beaver-tail handles on larger brushes, you’ll need a stronger grip because the brushes are wider and heavier. Hold the handle with the entire hand, letting the handle span the width of your palm as you would hold a tennis racket. This technique works best when you’re painting large, flat surfaces.

The goal of loading a brush is to get as much paint on the wall as possible without dribbling it all over the floor and yourself in the process. It will take you only a few minutes to be able to gauge accurately how much paint your brush will hold along the way. Meanwhile, start the job by dampening the bristles of the brush (with water for latex or the appropriate thinner for other types of paint) to condition them and make them more efficient. Remove excess moisture by gently striking the metal band around the handle’s base against the edge of your palm and into a sink or bucket.

Decorating Home

Get the home of your dreams with our selection of decorating equipment and accessories

Wallpaper

Whether you’re giving your kitchen a new lease of life, jazzing up the kid’s bedroom or creating a statement wall in your living room, we’ve got wallpaper to suit any DIY project.

If you love wallpaper, paint and all things interior design, then you have come to the right place. The Range has a huge collection of wallpaper, interior paint, sanding and stripping tools, adhesives, fillers and more accessories to redecorate your house with style. If you’re going to do some wallpapering at home, The Range offers damask wallpaper, feature wallpaper and kids wallpaper. Get all your DIY done for bedroom, living room, kitchen and bathroom walls with our pasting tables, surface covers, ladders and brushes. And don’t forget to check out our design trends, best sellers and brands such as Coloroll, Crown and Arthouse.

If you’re looking to paint rather than wallpaper, stock Dulux, Hammerite and Crown among many other brands in every colour under the rainbow! Once you’ve got you got your primer sorted, take home some tester pots and choose your colour scheme. And to complete the new look of your home, we also stock exterior paint for your outdoor walls. Shop by brand, including Ronseal and Cuprinol, and be the most house-proud people in the street. Inside and out, The Range has got all your decorating needs under one roof.

How to Paint a Mural

Learn how to paint a mural in acrylics! These pages will cover all the common questions you might have if you want to paint an indoor mural, such as:

What type of paint should I use to paint a mural?

What other materials do I need to paint a mural?

How do I prepare a wall before painting a mural on it?

What are some mural painting techniques?

How do I finish or seal the mural?

What type of paint to use for an indoor mural

When you paint a mural, you’ll have two distinct stages of painting, just as when you paint on canvas: first you’ll create an underpainting to block in main areas of color and outline the general composition, and then you’ll paint in the detail.

To paint large blocks of color (such as a stretch of blue sky, green hills, etc), use  interior household paint, also known as  latex paint. This is the kind of paint you would normally paint walls with. Painting large blocks of color with latex paint is more economical than trying to cover the entire wall with the artist quality acrylics that you buy from art supply stores. You will get better coverage from interior household paint and save yourself a ton of money in the meantime as you learn how to paint a mural.

Interior household paint comes in four different sheens: flat, eggshell, satin and semi-gloss. An eggshell sheen works best for mural. Steer away from satin or semi-gloss sheens, because they will be too shiny. The flat sheen is also not the best choice because it cannot be scrubbed. Eggshell, however, is just right, because it can be cleaned and it can safely accept layers of paint on top of it. 

To tackle the detailed work on your mural, use your tubes and jars of artist-quality acrylics and proceed just as if you were painting on canvas. Most brands of acrylics will work well for indoor mural painting

Unique Interior Paint Ideas That Show Personality

One of the things that makes a home truly yours is showing your unique style. Interior paint is one of the best ways to do this, and even a small change can showcase exactly who you are. There are a number of ways you can use interior paint in unique ways to create a space people will ooh and ahh over.

Wall Colors

The most obvious choice for paint is adding color to your walls. Don’t be afraid to use a color a bit outside the norm, especially if you plan to live in the house for a while. If you’re planning to flip the house or sell soon, neutral colors are often best.

Furniture

If painting walls a unique color isn’t your thing, then choosing a bright color and painting an end table, dresser or table might be the way to go.

Kitchen Cabinets

White cabinets with black granite countertops might be the current rage, but what if you thought outside the box a bit? Instead of painting old, builder’s grade oak cabinets white, what if you went with a color that was unique? More distinctive trends include cabinets in a deep navy blue with gray tiles on your backsplash.
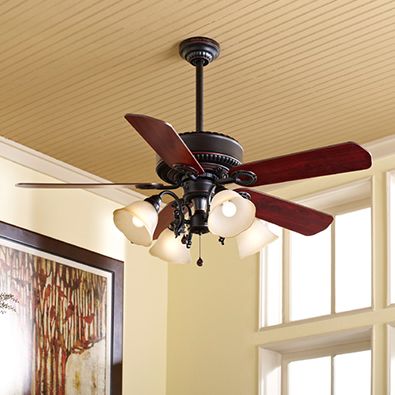
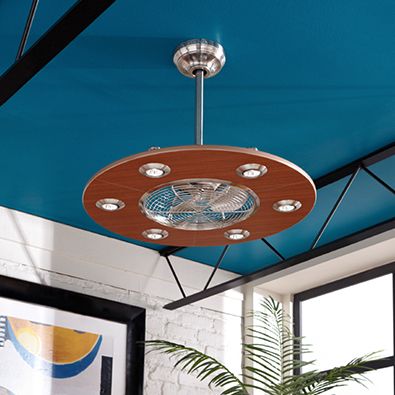
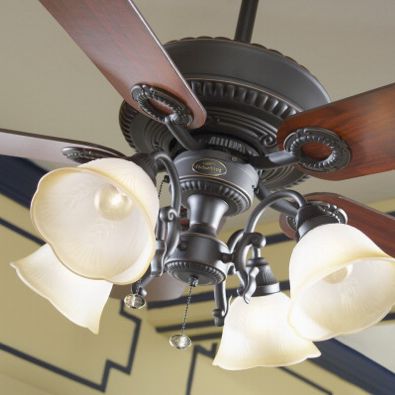
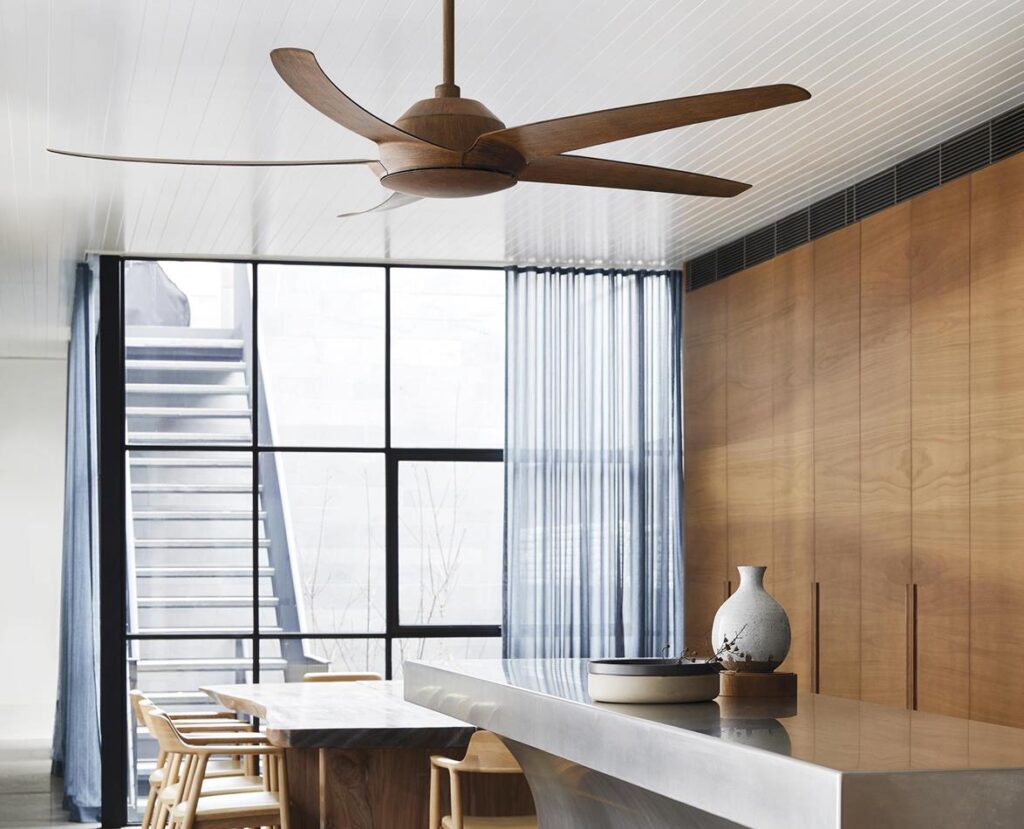
Ceilings

One trend that has been growing in popularity is adding a pop of color to a ceiling and keeping the walls a neutral color. This tends to add a fresh color without overwhelming the room. If sitting with friends and visiting, the color is barely noticeable, but it does make a statement when someone walks into a room. Consider white walls and a pop of orange or lime green on the ceiling.

Easy Fixes for Interior Painting Mistakes

Painting a room can be an easy and inexpensive upgrade, whether you’re freshening it up or dramatically changing the color. With a little planning and a few expert tips, this do-it-yourself project can be as quick and easy as it seems. Consumer Reports’ paint pro offers foolproof ways to prevent goofs and make flawless fixes.

Missed Spots

The goof. Blame this painting mistake on the lighting, fatigue, distraction, or spreading the paint too thin.

The fix. Good thing you kept the leftover paint (in a tightly sealed container, or course). After the paint dries—usually about 4 hours—touch up the missed spots with a brush. But if you do it before the paint dries completely you’ll mess up the paint surrounding the spot. As for spreading the paint too thin, a roller dipped in paint should cover a 2-by-2-foot section of the wall. See the video below for how to ace it.

Paint Runs

The goof. Perhaps you’re using a long-napped roller, loading too much paint on the roller or brush, or not spreading the paint well.

The fix. Once the paint dries, use fine sandpaper to remove the run, then retouch the area with a brush and a little paint, feathering the edges.

Roller Marks

The goof. A cheap roller with obvious seams could be the problem, and the paint makes a difference too.

The fix. Synthetic short-napped roller covers (1/4 inch) work best on most walls, ceilings, and trim. Use longer-nap roller covers for textured walls, or walls that have a very uneven surface from patching, for example. Rollers with steel frames and lots of tines are sturdier and stiffer than ones with just caps on the ends, and those sealed ends keep the paint on the roller cover.

Before using a new roller cover, use a piece of painter’s tape to remove loose lint. As for the paint, be sure to check out the smoothness scores in our interior paint ratings. They indicate whether marks from roller, brushes, or runs are obvious once the paint dries.

What You Should Know About Installing Ceiling Fans

How to Choose the Right Ceiling Fan

Most of us don’t think twice before heading off to the shops and buying the first ceiling fan that pleases the eye. At least for me, buying a ceiling fan for the home is a minor detail as compared to say, picking the right lights or choosing the colour of curtains. As it turns out, as if the myriad choices now available aren’t enough to confuse us (growing up, the standard three-blade white fan was a fixture in every home), there is actually a science behind choosing the right ceiling fan. Read these questions and answers to get your money’s worth the next time you need to buy a ceiling fan.

What size ceiling fan should I buy?

The size of the room would determine how big your ceiling fan should be. Fan size is measured by its diameter (blade span), which should be proportional to the space. A fan that’s too small for a room might not stir up enough air and one that’s too big could create a mini hurricane of sorts.

How high up should I hang my ceiling fan?

A fan needs to be suspended 2.4 to 2.7 metres off the ground for optimum air circulation. Do consider the size of the room before deciding on the type of fan – either a hugger fan or a fan with a downrod. Hugger fans, true to their name, hug the ceiling and are meant for low ceilings. Ideal for rooms with ceilings at least 2.4 metres high, they are mounted flush to the ceiling with no extra attachments. A space of 30 centimetres is the minimum required between ceiling and fan.

What’s with the different number of blades?

More is not merrier in this case. The number of blades a fan has is more an element of design than functionality. There is little difference between the performance of a three-, four- or five-bladed fan, so choose one based on preference and style

Does blade material make a difference?

Blades can be metal (stainless steel or aluminium), wood (timber, plywood or MDF) or PVC or plastic. There’s no difference in performance, so feel free to choose one that complements your sense of style, but ensure it’s of good quality. A high-quality finish will resist corrosion, blistering and fading. A good metal finish will not need polishing for several years and good-quality plastic finishes will stay thick and durable for many years

Ceiling Fan Buying Guide

Choose the Right Ceiling Fan for Your Space

A ceiling fan’s primary purpose is to circulate air in a room. Air conditioners chill air, but ceiling fans push it around, which means they’re useful for both cooling and heating. In a bedroom, a ceiling fan encourages restful sleep without running the air conditioning. On an open or screened porch, a ceiling fan can create a refreshing retreat — just be sure it’s rated for damp or wet locations. Look for outdoor fans with weatherproof fan blades, too. Both types can handle moisture, but damp-rated fans shouldn’t come in contact with water. Wet-rated fans are suitable for coastal or rainy areas.

Ceiling Height

When selecting a new or a replacement ceiling fan, keep in mind the ceiling height. The ideal fan height from floor to fan blades is approximately 8 feet. Many fans have multiple mounting options, allowing them to work almost anywhere in the home. Measure the height of your ceiling to determine the mounting option that’ll work best for your space

Mounting Options

Flush Mount: Made for rooms with low ceilings where a low profile is wanted or required. These ceiling fans are mounted flush to the ceiling, with no extra attachment

Ceiling Fan Blades

The look of a ceiling fan’s blades are actually more of a design feature than a matter of efficiency or utility. The fan’s ability to move air is determined by the pitch of the blades, so pick the one you like the look of best. Many fans come with reversible blades so if you get tired of one finish, you can reverse them later. Talk about an effortless design update. The number of blades and blade shapes are also getting a makeover. Some fans have as many as nine blades, for a helicopter style; however, the traditional four- to five-blade ceiling fans remain classic.

Ceiling Fan Direction in Summer and Winter

Change the ceiling fan direction to make it more comfortable year-round, and save energy and money by adjusting your thermostat. In the summer, set the fan blades to revolve in a counterclockwise direction as you look up at it to create a downward motion and a cooling effect. Doing this also raises the thermostat temperature, which will reduce your air conditioner’s workload.

How to choose the best ceiling fan

Ceiling fans are a great way to stay comfortable when the temperature rises. They can work in tandem with your air conditioning to circulate cool air, or as a cost-effective alternative. When choosing the best ceiling fan for your space, there are a few things you might want to consider.

What size ceiling fan

It might sound obvious but the basic rule is the larger the room, the bigger the fan required. For a small room (up to 20 square metres) fans with blades up to 122cm are ideal. For a bigger room, you’ll probably want to look for a fan with blades that are 130cm or more

Take control

Generally, there are two options when it comes to controlling your fan. Either a wall switch with a dial to vary the speed, or a remote control if access to the roof and wiring is an issue

Three or four blade ceiling fans

Most fans have either three or four blades and are made of either plywood, metal or plastic. The number of blades has no effect on their ability to cool a room but timber and plastic blades do tend to be a little quieter than metal.

Finish and colour

Another factor worth considering is how your fan is going to look within a room, as they can become a dominant feature. This is not too much of an issue if it’s going to be installed in an outdoor area, but for indoor fans it’s worth thinking about how it will complement your colour scheme and décor.

Ceiling fans: a guide to choosing the right one

The ceiling fan is one of those household essentials in which form and function can be perfectly married. The latest styles range from graceful good looks to fabulous statement-makers, and they’re useful year-round to help keep you cooler in summer and warmer in winter. Here’s what you need to know.

SIZE MATTERS

When it comes to ceiling fans, size is actually everything. “A small fan in a large room will have to work twice as hard to cool you off, while a large fan in a small room may create an uncomfortable amount of airflow,” says Beacon Lighting’s Denise Hammond. For a small to medium-sized room up to 4m x 5m, select a fan with 122cm blades, suggests Denise, while blades of 132cm-plus will suit a room size of up to 6m x 6m. In a large, open-plan space, you may need two or more models.

It’s less the number of blades than the shape of the aerofoil that truly determines the effectiveness of the fan, explains Sarah Johnston of Big Ass Fans. “Our aerofoil design includes an upswept blade angle, that has been designed to provide greater air flow and therefore more effective coverage of a room in comparison to traditional ceiling fans,” she says.

PERFECT POSITIONING

“Blades need to be at least 2.1m from the floor,” says builder Patrick Toner of All Things Building, so if you have low or standard 2.4m ceilings you’ll need to look for a low-profile model that can be fitted flush to the ceiling. “Most fans come with a ball canopy fixing method, which means fans can be mounted on sloping, vaulted or flat ceilings,” explains Denise. For high or raked ceilings, an extension rod might be necessary to actually bring the fan down to an efficient height.

POWER BENEFITS

Fans don’t cool the air, they just move it around the room. “The faster the air moves over your skin, the more it works to evaporate perspiration, which is the mechanism your body uses to cool itself,” explains Denise Hammond. A ceiling fan demands just a fraction of the power needs of an air conditioner, and using both together can reap serious energy-saving benefits. “The two work well in tandem by dropping the initial temperature of a room, and then circulating that colder air,” says Denise.

How to Choose the Right Size Ceiling Fan for Your Room

There’s more to choosing a ceiling fan than grabbing one you like off the shelf. It first begins with understanding the height, size and type. Follow the steps to properly measure to get the right fit.

Determine the correct blade span for the room

It seems obvious that you want a smaller ceiling fan for a smaller room and a larger ceiling fan for a larger room. But for best performance, you need a ceiling fan with the correct blade span for the room. If the fan has an odd number of blades, measure from the center of the fan to the end of one of the blades and multiply the number by two. If the fan has an even number of blades, measure from one end of a blade to the end of the blade on the opposite side.

Determine how high to hang your fan

How high you hang your ceiling fan and the type of mount you need depends on the height of your room and whether or not the ceiling is sloped. Hanging your ceiling fan at the right height will give you the best airflow.

Determine the right downrod

Choosing the right downrod is important so that you can mount your ceiling fan at a safe distance from your head

For sloped ceilings:

A sloped ceiling requires a slope mount to hang a ceiling fan. Make sure the fan is mounted at the middle of the room at an appropriate height. The distance from the floor to the fan blades must be minimum 8 feet.