How to Choose a Circuit Breaker
There are a few different criteria to consider when selecting a circuit breaker including voltage, frequency, interrupting capacity, continuous current rating, unusual operating conditions and product testing. This article will give a step by step overview on selecting an appropriate circuit breaker for your specific application
Voltage Rating
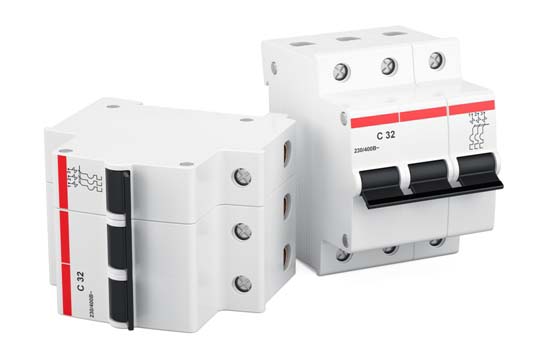
Circuit Breakers Available in Different Sizes & ConfigurationsThe overall voltage rating is calculated by the highest voltage that can be applied across all end ports, the distribution type and how the circuit breaker is directly integrated into the system. It is important to select a circuit breaker with enough voltage capacity to meet the end application
Frequency
Circuit breakers up to 600 amps can be applied to frequencies of 50-120 Hz. Higher than 120 Hz frequencies will end up with the breaker having to derate. During higher frequency projects, the eddy currents and iron losses causes greater heating within the thermal trip components thus requiring the breaker to be derated or specifically calibrated. The total quantity of deration depends on the ampere rating, frame size as well as the current frequency. A general rule of thumb is the higher the ampere rating in a specific frame size the greater the derating needed.
Maximum Interrupting Capacity
The interrupting rating is generally accepted as the highest amount of fault current the breaker Control Panel Circuit Breakerscan interrupt without causing system failure to itself. Determining the maximum amount of fault current supplied by a system can be calculated at any given time. The one infallible rule that must be followed when applying the correct circuit breaker is that the interrupting capacity of the breaker must be equal or greater than the amount of fault current that can be delivered at the point in the system where the breaker is applied. Failure to apply the correct amount of interrupting capacity will result in damage to the breaker.
Continuous Current Rating
In regards to continuous current rating, molded case circuit breakers are rated in amperes at a specific ambient temperature. This ampere rating is the continuous current the breaker will carry in the ambient temperature where it was calibrated. A general rule of thumb for circuit breaker manufactures is to calibrate their standard breakers at 104° F.
Guide to Buying An Electrical Circuit Breaker
A large safety concern in both residential and commercial buildings is overloading or causing a short circuit within the electrical circuit. The component that is used to prevent this from occurring is an electrical circuit breaker. A circuit breaker is used to protect the circuits within your home or business. If a fault is detected within the circuit the system will cause a break in the electrical current flow causing the system to come to a halt.
The type of circuit breaker you choose to purchase will depend on a number of things. In order to purchase the correct electrical circuit breaker you need to clearly understand your needs and the needs that will be placed on the system. When purchasing a new or refurbished circuit breaker, your electrical supplier will discuss several factors with you to help you select the best breaker for your needs.
The first thing an electrical supply company will ask you about when purchasing a circuit breaker is the amount of electricity that will be flowing through the breaker. The voltage load of the circuit breaker you choose will depend heavily on the equipment that will be used on the circuit as well as the overall load of electricity that will run through the circuit.
There are three main voltage categories when it comes to circuit breakers. Low voltage circuit breakers are used in residential electrical circuits. A low voltage electrical circuit breaker works best in households and can handle a max load of 1000 volts. Medium electrical circuit breakers are suitable for buildings and office settings. A medium breaker is good for use when voltage requirements are between 1000 and 72,000 volts. Large electrical circuit breakers handle voltage loads upwards of 72,000. Large breakers are typically used for high voltage power transmission lines.
The next consideration of various circuit breakers is the mounting style. The two main components are fixed mounted circuit breakers and removable mounted circuit breakers. A fixed mounted circuit breaker is mounted so that it cannot be removed without removing the main connections and mounting supports. A removable mounted circuit breaker has two parts, the base and the actual breaker. The base is bolted and hardwired to the frame where is the breaker is plugged into the base. This system can be replaced without having to rewire
Requirements of a Circuit
Suppose that you were given a small light bulb, an electrochemical cell and a bare copper wire and were asked to find the four different arrangements of the three items that would result in the formation of an electric circuit that would light the bulb. What four arrangements would result in the successful lighting of the bulb? And more importantly, what does each of the four arrangements have in common that would lead us into an understanding of the two requirements of an electric circuit?
The activity itself is a worthwhile activity and if not performed before, one ought to try it before reading further. Like many lab activities, there is power in the actual engagement in the activity that cannot be replaced by simply reading about it. When this activity is performed in the physics classroom, there are numerous observations that can be made by watching a class full of students eager to find the four arrangements. The following arrangements are often tried and do not result in the lighting of the bulb
Light Bulb Anatomy
Once one group of students successfully lights the bulb, many other lab groups quickly follow suit. But then the question emerges as to what other ways that the cell, bulb and bare wire can be arranged in such a manner as to light the bulb. Often a short light bulb anatomy lesson prompts the lab groups into a quick discovery of one or more of the remaining arrangements
A light bulb is a relatively simple device consisting of a filament resting upon or somehow attached to two wires. The wires and the filament are conducting materials that allow charge to flow through them. One wire is connected to the ribbed sides of the light bulbs. The other wire is connected to the bottom base of the light bulb. The ribbed edge and the bottom base are separated by an insulating material that prevents the direct flow of charge between the bottom base and the ribbed edge. The only pathway by which charge can make it from the ribbed edge to the bottom base or vice versa is the pathway that includes the wires and the filament. Charge can either enter the ribbed edge, make the pathway through the filament and exit out the bottom base; or it can enter the bottom base, make the pathway through the filament and exit out the ribbed edge. As such, there are two possible entry points and two corresponding exit points.
The Requirement of a Closed Conducting Path
There are two requirements that must be met to establish an electric circuit. The first is clearly demonstrated by the above activity. There must be a closed conducting path that extends from the positive terminal to the negative terminal. It is not enough that there is simply a closed conducting loop; the loop itself must extend from the positive terminal to the negative terminal of the electrochemical cell. An electric circuit is like a water circuit at a water park. The flow of charge through wires is similar to the flow of water through the pipes and along the slides at a water park. If a pipe gets plugged or broken such that water cannot make the complete path through the circuit, then the flow of water will soon cease. In an electric circuit, all connections must be made and made by conducting materials capable of carrying charge. As the cell, bulb and wire experiment continues, some students explore the capability of various materials to carry a charge by inserting them in their circuit. Metallic materials are conductors and can be inserted into the circuit to successfully light the bulb. On the other hand, paper and plastic materials are typically insulators and their insertion within the circuit will hinder the flow of charge to such a degree that the current ceases and the bulb no longer lights. There must be a closed conducting loop from the positive to the negative terminal in order to establish a circuit and to have a current.

Electrics: The Basics
Getting Started
Designing and installing a new electrical system in your home is one of the more complicated elements of the overall building project. Most renovators, faced either with historic electrics untouched since the era of Bakelite’s dominance (if not before) or, perhaps worse, ‘improved’ and amended over years of previous owners’ marginal projects (closed off faceplates and switches that don’t work being classic signs) will also be keen to bring things up to date.
A Word on DIY Electrics
Electrics is one of the more dangerous elements of a home construction project. Each year, on average, 10 people die and 750 people are seriously injured as a result of electrical work — so approach any attempts at DIY seriously.
Part P of the Building Regulations legislates for DIY electrical work. Electrical work is split into jobs that are either ‘notifiable’ or not. If a job is notifiable, it either needs to be carried out or certified by a registered competent person (e.g. a NICEIC member) or inspected by Building Control. (So you can undertake the jobs on a DIY basis, but need to get someone to certify them.) If it’s not notifiable, work can be carried out in the same way as regular DIY: i.e. no one needs to be informed.
The Basics
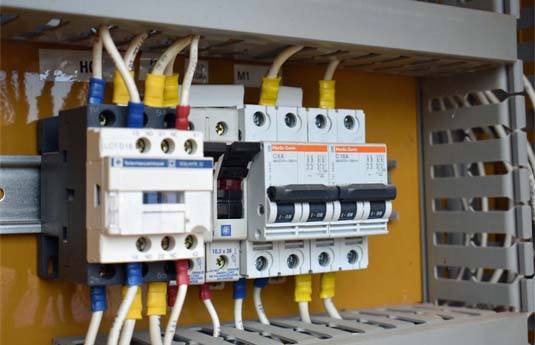
Electrical systems start with, and from, the meter, which belongs to the electricity board. From there it goes to your consumer unit (also known as a distribution board or fuse board) which has a main switch, and to the lifesaver RCD (Residual Current Device), and then it feeds all the circuits in your house via a miniature circuit breaker — MCB (fuse).
RCDs really are lifesavers: they trip out on leakage, not overload, meaning they cut off the flow of electricity automatically when they sense a ‘leakage’ – or imbalance – of electric current from a circuit. Whatever’s going into the circuit, carried on the live and neutral wires, must remain balanced as it flows through and returns — or the RCD will trip.
Electric Circuit Studio | User Guide
Electric Circuit Studio (ECStudio) is a set of tools used for building electronic circuits, SPICE simulation, and calculation of circuits. These tools are complemented by the information center containing resources, connector pinouts and interactive book explaining basic electrical theorems, laws and circuits. It is a useful application for all electronics hobbyists, students, or other people with an interest in electronics.
Schematic editor and SPICE simulator allow easy creation of circuit diagrams and SPICE analysis of the created circuits. ECStudio simulator is focused on visual representation of simulated results, such that simulated voltages and currents can be placed elsewhere in the circuit, as a text or graph. Moreover, the magnitude and polarity of voltages and currents can be represented by visual indicators, so you can check the results quickly. All results can be additionally displayed on the top plot, where they can be explored using two cursors.
Restricted Mode
If the Restricted Mode item from the Menu is checked, the view will be scaled to fit the whole circuit and the application will be switched to the Restricted mode.
Sim. Shows Plot
If the Sim. Shows Plot item from the Menu is checked, the Plot window will be displayed after the start of simulation. This window can be hid immediately by a fling gesture.
Opening Circuits
Use Open Circuit from the Menu to show Open Circuit dialog, allowing you to find a desired file and tap on its name. Or you can use Favorites to open a bookmark file. In the Open Circuit dialog you can delete, rename or bookmark (add to favorites) a file using the long tap gesture. There is also a search form to quickly search for a file.